Memorial Day is one of those days that we cherish and thank all of the fallen service men and women for our freedom and rights. Everyone shares this day in their own way. One way my family has always shared this day was through showing our patriotism through our wonderful countries colors, Red, White and Blue. Create DIY Memorial Day crafts without breaking the bank.
Ways To Honor On Memorial Day
You can hang an American Flag on the outside of our home to remember family members that have served and died for this amazing country. We usually hold a BBQ like most American families, to spend time together and share in our freedom.
Decorating for Memorial Day
I always like to decorate as much as I can in our countries colors on Memorial Day. Here are a few DIY Memorial Day crafts to easily decorate your home Red, White and Blue. You can make a lot of these very inexpensively and place them outside to light up your Memorial Day BBQ. You could also use citronella candles to keep the mosquitoes away.
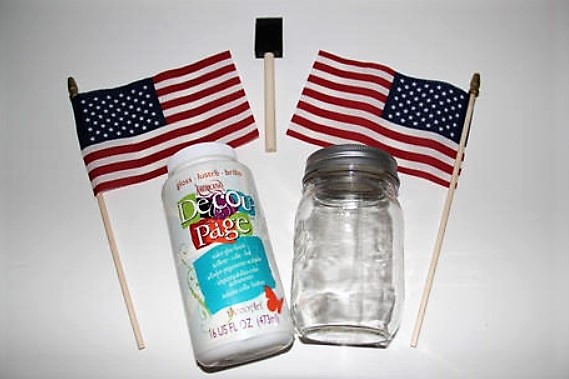
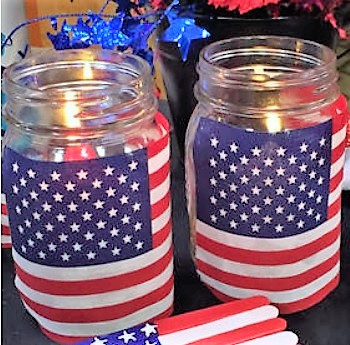
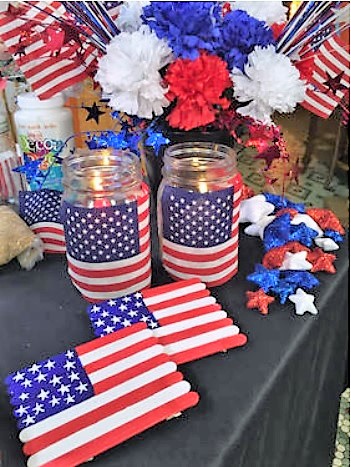
Mason Jar Candles
- Sand
- Small American Flags
- Small Candles
- Americana Decou Page
- Sponge Brush
- Glue dots
Directions
- Be sure that the Mason jar is clean on the outside.
- Paint a layer of Decou Page onto the outside of the jar, about the same size as the American Flag.
- Place the American flag onto the wet decou page and press it until it sticks.
- To hold the corners down, place a glue dot on each corner and stick it to the glass.
- The glue dots are very strong and will hold the corners down.
- Pour the sand into the mason jar, about ¼ of the way up the jar.
- Place the candle inside the jar.
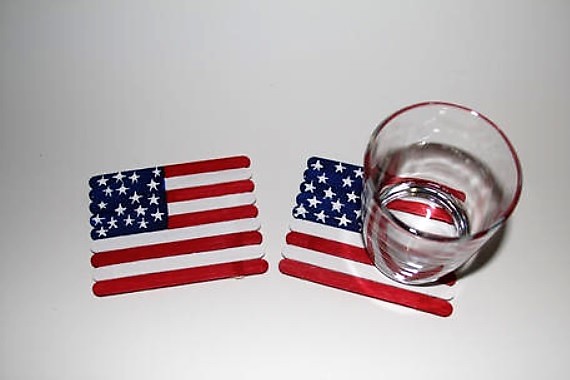
Flag Coasters
- Popsicle Sticks
- Americana acrylic paint in Red, White & Blue
- Sponge Brush
- Hot glue gun
- Small paint brush
Directions
- Paint five Popsicle sticks red and 4 Popsicle sticks white for each coaster.
- You may need to paint each stick with 2-3 coats of paint, be sure to let it dry at least 10 minutes in between coats.
- Next paint 3 red and 2 white Popsicle sticks a little less than half with blue paint.
- You will need at least 3 coats of blue paint on the white Popsicle stick to match the blue on the red Popsicle stick.
- Let each stick dry at least 10 minutes between coats.
- To paint the stars, you can either do polk-a-dots with the tip of a small paint brush. or you can also use a toothpick to pull 5 lines to make it look like a star.
- After all of the sticks have dried, flip them over and glue a thin stream of glue down the whole side of the sticks.
- Then place one of the sticks on it to hold the other sticks in place, do this again on the other end of the coaster.
- Let it dry for about 10 minutes.
Memorial Day Strawberries
- Strawberries
- White candy melts
- Red candy melts
- Wilton melting pot (cake decorating bags, or Ziploc bags or even a bowl)
- Red, white and blue sprinkles
- Paper plate
- Parchment paper
Directions
- First, melt the candy melts in the melting pot or microwave.
- Next, wash and dry your strawberries.
- Place the sprinkles onto a paper plate.
- Once the candy melts are melted, dip the tip of the strawberry into the melted candy melts.
- Then roll it in the sprinkles, place on parchment paper to cool. Enjoy…
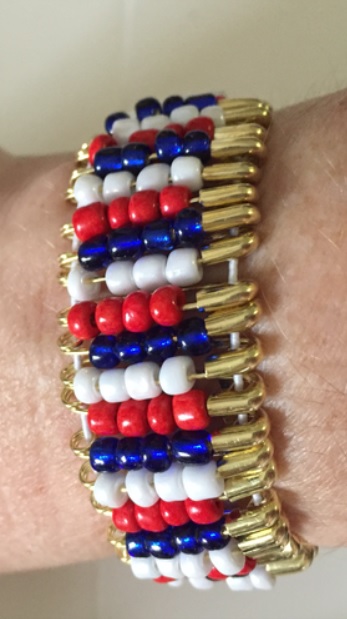
Memorial Day Bracelet
- 60 – 100 safety pins (depends on size of pin and size of wrist)
- Stretch string
- 6/0 Seed Beads in red, white and blue
- Super glue
Directions
- First, string 3-4 bead on the poky part of the safety pin until it is full and still able to close.
- Make 20 – 30 of these pins for each color of bead (this is determined by the size of your wrist).
- Once all of your pins are done, string one piece of string through the hole in the top of the safety pin.
- Then one piece of string through the bottom hole of each safety pin.
- I strung my pins, 1 red, 1 white and 1 blue, and so on.
- Once you are done stinging all of the pins, tie the end of the string to the other end of the string. Be sure you are tying the correct ends together.
- I did a couple square knots to be sure they held really well, you can also place a little super glue on the end so that it will hold even better.