The 4th of July holiday is one of my favorite holidays. It means so much to so many. Independence, freedom, and time with your family and friends. I love decorating for the 4th of July. Here are a few 4th of July party crafts with red, white, and blue. From cookies to party boxes, even a fun craft that the kids will want to save and do over and over again.
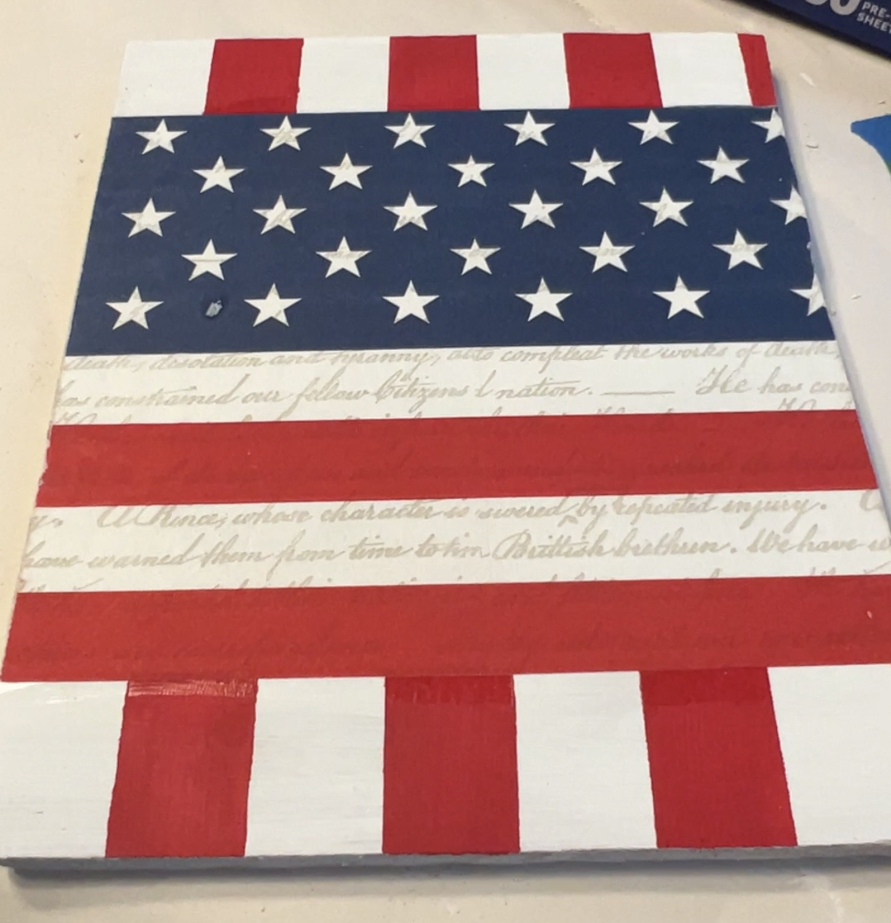 American Flag Wall Hanging
This is a fun craft that you can do any time of the year. Just grab your favorite paper napkin and any kind of wood piece and have fun creating a beautiful piece of art.
Items Needed
- Paper Napkin
- Wood Board, Skinny Works Best
- Decoupage
- Parchment Paper
- Sponge Brush
- San Paper Block Or Sheet
- Red and White Acrylic Paint
- Painters Tape
- Crafting Heated Iron
Directions
- Paint the wood board white.
- Cut the napkin to the size you want for the board.
- Separate the back of the napkin so it is only 1-ply.
- Measure where the napkin is going to be on the board and tape off that area with a line of tape.
- Using strips of tape, measure the flag stripes for where you will paint the red paint.
- Paint the exposed stripes on the board with the red paint.
- Let all of the paint dry completely.
- Paint a layer of decou page onto the board where the napkin will be, make sure you have an even coat over the whole section.
- Let this dry.
- Place the napkin down on the dried decoupage and cover with a piece of parchment paper.
- Make sure your iron is on high, and iron over the parchment paper.
- Check the napkin to be sure it is completely stuck to the wood.
- Using the sandpaper, rub off the excess napkin from the side of the wood.
- You can paint another coat of decoupage over the napkin, or leave it as is.
- Place the board on a plate stand or use a frame hanger to hang it on the wall.
Related – 4th Of July Outdoor Party
4th Of July Popsicle Cookies
Who doesn’t remember running after the ice cream truck when we were kids? I loved the blow pop, it was red, white, and blue, and perfect for the 4th of July. Here is an easy way to bring back that memory, and it won’t melt on you.
Items Needed
- Popsicle Sticks
- Refrigerator Sugar Cookie Dough
- White Frosting
- Red And Blue Food Coloring
- Parchmet Paper
- Pizza Cutter
Directions
- Separate the cookie dough into three sections.
- Press one of the cookie dough sections flat and add 6-8 drops of red food coloring to it.
- Fold the food coloring into the cookie dough until it is completely red.
- Do the same with another section of cookie dough and the blue food coloring.
- Press the red, white, and blue sections together onto plastic wrap until it looks like a strip of red, white, and blue.
- Place it in the refrigerator until it is hardened and cool.
- Take the dough out of the refrigerator and cut it into sections.
- Place the sections onto a parchment paper lined cookie sheet.
- Using a fork, press down on each section just a bit to flatten it.
- Place the cookie sheet into the oven and follow the cooking instructions on the cookie dough package.
- As soon as the cookies come out of the oven, cut off the excess sides with the pizza cutter.
- Let the cookies cool completely.
- Put the frosting in a zipper bag or frosting bag.
- Add a layer of frosting to the inside of one cookie.
- Put a popsicle stick or cookie stick on the inside and add more frosting.
- Place another cookie on top.
- Let the cookies sit for a while in the refrigerator so the frosting will harden.
- You could put each cookie in a baggy for fun.
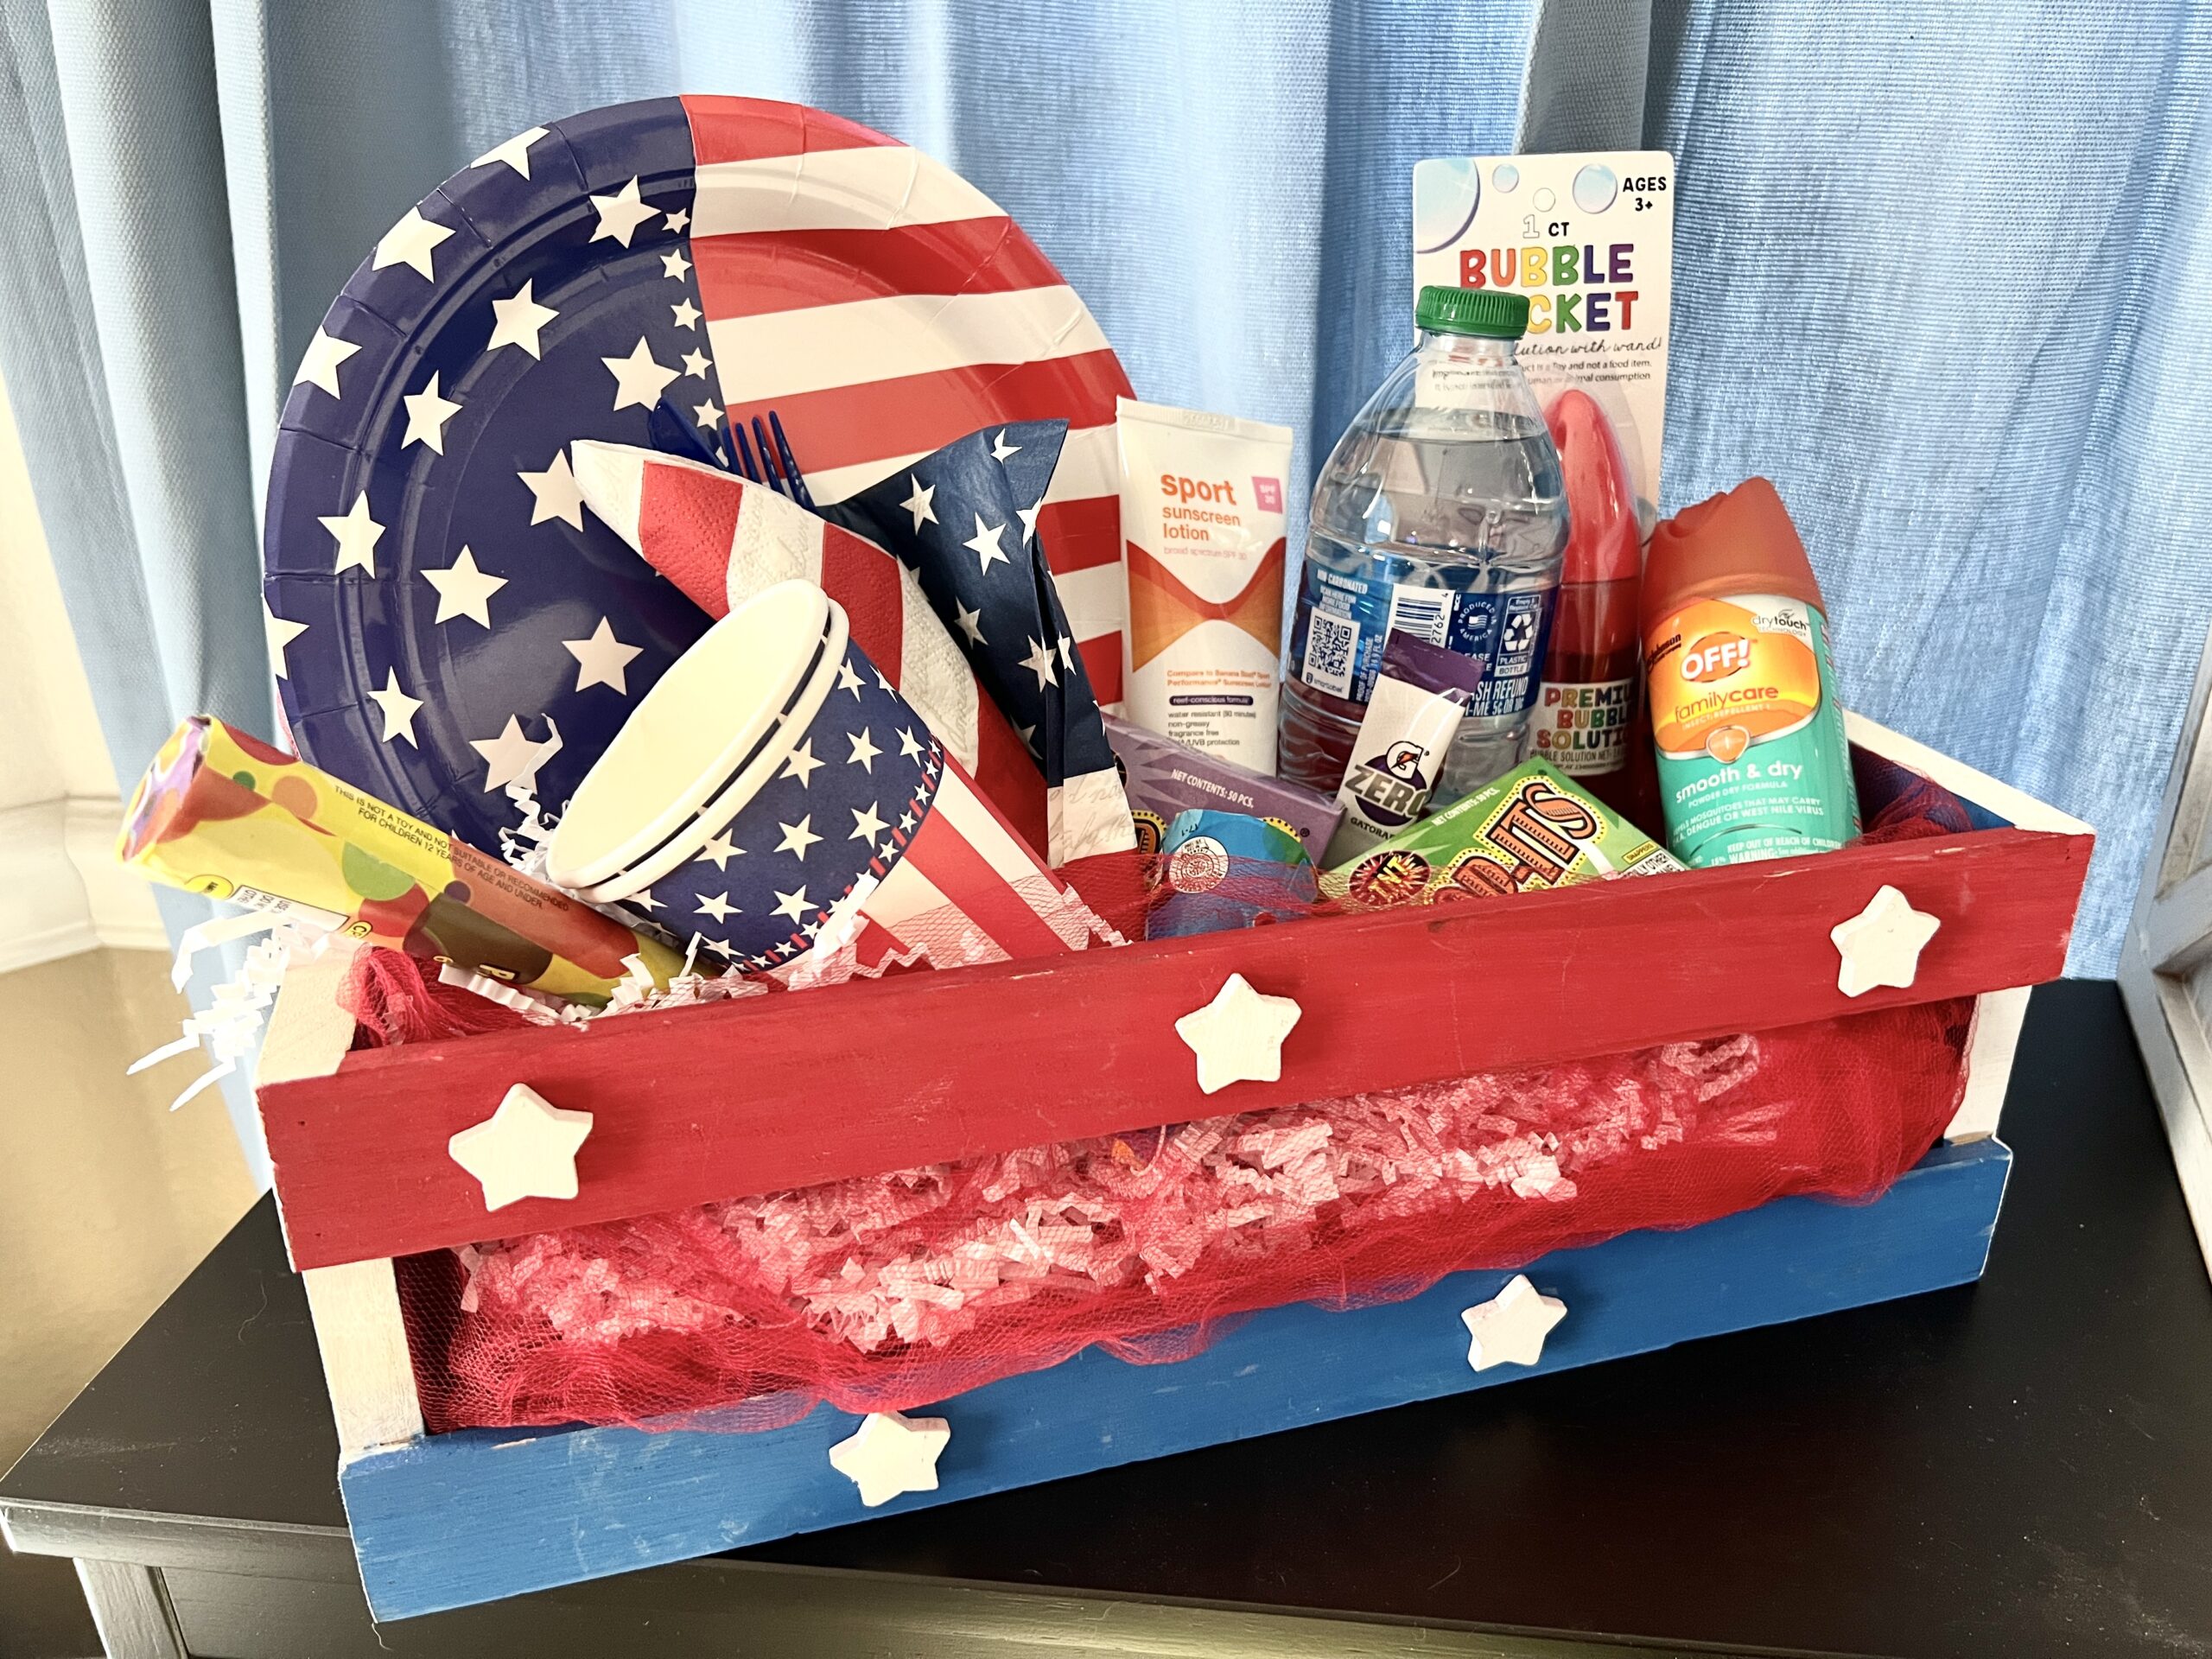
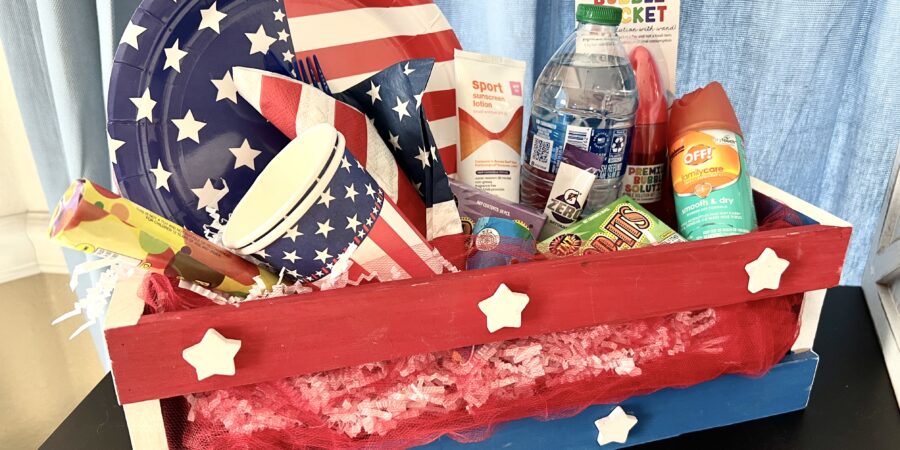
4th Of July Party Box
I love to give all of my party goers a fun party box that they can use during the get together, and also take home. This is a great way to DIY your 4th of July party crafts and give your friends and family something fun to remember the wonderful party.
Items Needed
- Wooden Box
- Red, White, And Blue Paint
- Sponge Brush
- Crinkle Cut Paper
- Tulle
- Fun Things To Give Your Guests
- Bubbles
- Water
- Chips
- Poppers
- Plate
- Napkin
- Cup, Silverware
- Sunscreen
- Bug Spray
- Sunglasses
Directions
- Paint the wood box with the red, white, and blue paint, however you would like.
- Place the tulle and crinkle cut in the box.
- Add all the fun things you got your guests.
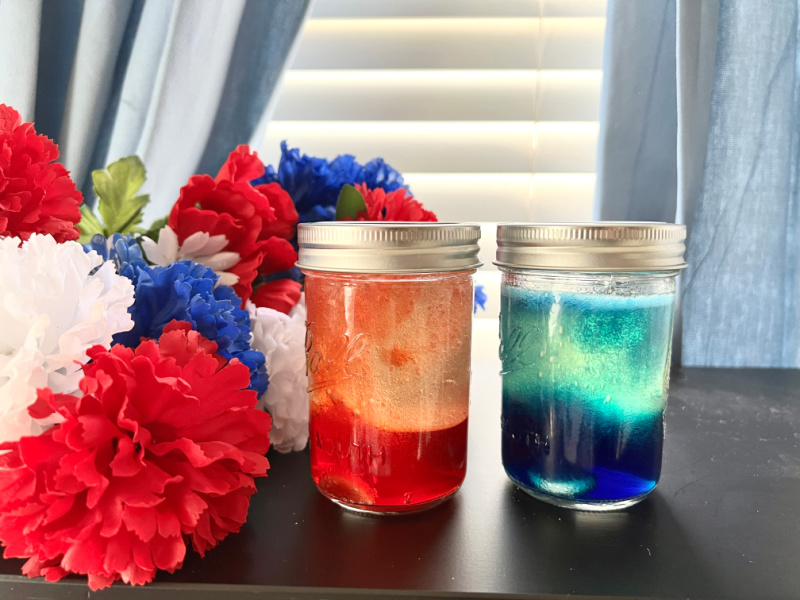
Fun And Fizzy Oil Lamp
Remember the lava lamps from when we were kids? This craft is fun to make, fun to play with, and make great party favors. You could even place each person’s name on them and use it for a place setting at the table.
Items Needed
- Mason Jar
- Vegetable Oil
- Water
- Alka Seltzer
- Food Coloring
Directions
- Fill the Mason jar 3/4 full with the vegetable oil.
- Slowly fill the rest of the jar with water.
- Add 6-8 drops of food coloring.
- Let it all completely settle.
- Break the Alka Seltzer into smaller pieces and drop one or two into the jar.
4th Of July Center Piece
Jazz up any table with some 4th of July party crafts like this center piece. This is an easy to create project that you can pack away and use every year. You can even involve the kiddos in making the fun paper towel roll fireworks.
Items Needed
- Large Clay Pot
- Red, White, and Blue Paint
- Painters Tape
- Sponge Brush
- Styrofoam
- Red, White, And Blue Flowers
- 4th of July Floral Pics
- Paper Towel Firecrackers (See Below for Instructions)
Directions
- Paint the Clay Pot Red.
- Place the Panters tape in sections on the top of the clay pot.
- Alternate stripes with blue and white, or you can just paint white stripes.
- Put a piece of Styrofoam at the bottom of the clay pot.
- Start adding the flowers, pics and rockets to the Styrofoam.
4th Of July Firecrackers
These are so fun to make, and you can create a bunch of them for decorations around your home. The kiddos can get in on this one because there is no hot glue.
Items Needed
- Paper Towel or TP Rolls
- Dowel Rods
- Red, White, And Blue Card Stock
- Glue Dots
- Scissors
Directions
- Add glue dots to one end of card stock.
- Roll a paper towel roll onto the glue dots.
- Next, place glue dots onto the other end of the card stock and finish rolling the paper towel roll until it is covered.
- Create a point by cutting another color of card stock into a half circle and connect the ends with glue dots.
- Glue the point to the top of the paper towel roll with glue dots.
- Add a dowel rod to the inside of the rocket with glue dots if you are placing it into the center piece.